Home | Contact | About | Articles | Stories | Photos | Switch to Free
Decoding PowerPaint's custom image format
This all started from my interest in old hardware. I'd acquired an old 90s laptop PC from a coworker, and I decided to install FreeDOS on it. While browsing the available FreeDOS software, I stumbled upon PowerPaint 2, an image editor. I decided to give it a try, and I made a very amusing doodle that I simply had to get onto my main PC.
The trouble was that PowerPaint supports 3 different image formats, and all of them appear to be custom to PowerPaint. The one I used for the image was called YMG, and there isn't a way to convert them once they're created. In my persistence, I decided I would have to reverse engineer the format myself to convert my precious drawing:

To make things simple, I drew a test image:

It may look a little blurry here (because anti-aliasing), but it's just the first few colors in the program's color palette put in order in the smallest canvas allowed by the program.
I opened up this YMG file using a hex editor and analyzed the data. It looks like:

From what I guessed, it had an 8-byte header, and the rest of the bytes represented the color of a single pixel per byte. My guess for the header was as follows:
The first 2 bytes are the image width; the second 2 bytes are the height. The fifth byte was always 0x03, which seems to be an internal code used by PowerPaint to represent the YMG format. The last 3 bytes of the header are the ASCII letters y, m, and g, representing the format.
Next, I had to figure out the color palette. It didn't take long to see that the colors are not necessarily in order using a common RGB bit mask. The first 8 colors followed a pattern where the low 3 bits represented red, green, and blue (in descending order of significance), and the next 8 colors were the same but a bit brighter. However, the next 16 colors just ascended the gray scale. I couldn't think of a conceivable simple algorithm that would produce colors in that order, so I went to the source code.
I spent 5 hours scouring the source for anything related to color palettes. I found the routines that would set and get the VGA color palete, but the palette setting routines were never called in the main program. It seemed to be pulling the palette out of thin air. At the brink of giving up, I closed my editors and just looked at the file names in the source distribution for anything that hinted at what I was looking for. Lo and behold, my eye caught a file by the name of DEFAULT.PAL, and I figured the extension was short for palette.
I opened it with my hex editor, and sure enough, it seemed to resemble the pattern I was seeing. Each 3 bytes seemed to contain an RGB value, and the file's length was 256 times 3, the expected number.
At this point, I started writing code.
I had it read the header to determine width and height, and I had it load the
palette file to make the correlation of numbers to colors. From there, I used
the wand module to generate the final image and save it to disk.
Immediately, I had errors. Somehow, the last row of the image didn't line up with the expected width. Figuring it must mean that it shaved off the last bit of the image for some primitive size reduction, I added some code to just fill in the missing bit with black. Then, I got this image:
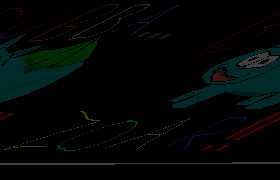
Well, something was clearly not right. It became clear that the width wasn't quite right. I tried subtracting 1 and then 2 from the width, and I finally got something more acceptable:

The image was still really dark, though. It seems the palette file's RGB values were lower than what was showing on my DOS computer. I settled on multiplying the color values by a constant 4.2, resulting in a more desirable result.
Epilogue
The converter still isn't perfect. It was including some gray pixels at the bottom of the image that the DOS program never displayed. Could be an error in PowerPaint's programming, or a shortcut they took somewhere. I just changed them to black and changed the image dimensions using an image editor.
Also, the pixels on my DOS computer are actually not perfect squares; they're slightly too tall. As a result, the final image looks just a little squished vertically, and there's no good way to restore its dimensions.
If you ever decide to use PowerPaint yourself, you can download my program to convert your images to modern formats (but I'm not writing documentation for it). However, I plan to write a C program some time to replace PowerPaint and use the well-documented Bitmap format so that conversion won't be necessary, and I may be able to support 16- or 32-bit color.